


You know the situation: someone asks, “Can you quickly write down how to do this?”
Sure. Except “quickly” means doing the process again, taking screenshots, cropping them, numbering everything, writing instructions, adding arrows and then realizing you forgot Step 7.
This is exactly what Scribe is designed to eliminate.
Instead of writing a tutorial, you perform the task once and Scribe documents what you do automatically. It captures your clicks and keystrokes and turns them into a visual step-by-step guide with screenshots and written instructions.
A Real Example
Imagine you need to explain to a colleague how to publish a new article in WordPress.
Normally, you’d write something like:
Log in → Posts → Add New → Enter title → Add featured image → Select category → Publish…
And then start taking screenshots.
With Scribe, you simply publish one article yourself.
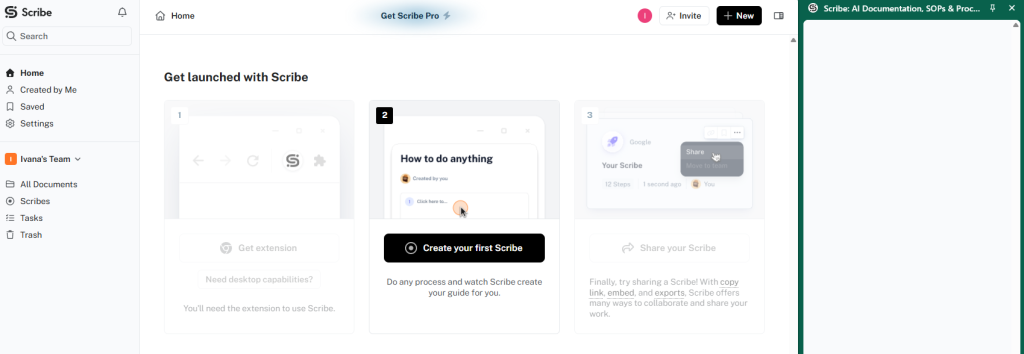
Step 1: Install Scribe
Create a Scribe account and install its Chrome or Edge extension if you’re documenting something in your browser.
Scribe also has Windows and Mac desktop apps for processes that happen outside the browser.
Step 2: Open the Process You Want to Explain
Go to WordPress—or whatever tool you’re creating instructions for.
Get yourself to the point where the tutorial should begin.
For our example, we’d open the WordPress dashboard.
Step 3: Hit Start Recording
Click the Scribe extension → Start Recording.
Now forget about the tutorial.
Just do the job normally.
Click Posts.
Choose Add New.
Enter the title.
Add the article.
Upload the featured image.
Select the category.
Click Publish.
Scribe records the process as you work.
Step 4: Stop Recording
When you’re finished, stop the recording.
And here’s the satisfying part.
Scribe automatically creates a guide containing individual steps, screenshots, text instructions, links, clicks and keystrokes based on what you just did.
Instead of spending half an hour writing:
Step 1: Click Posts
…you already have the tutorial.
Step 5: Clean It Up
You don’t have to accept everything exactly as Scribe generated it.
You can edit the instructions, add or remove steps, insert tips and headers, and customize the guide. Screenshot cropping, annotations and redaction of sensitive information are available on paid tiers.
This is where I’d spend a few minutes removing unnecessary clicks and adding context that Scribe couldn’t know.
AI documents what you did.
You explain why it matters.
Step 6: Share It
Once you’re happy, hit Share.
You can send the guide with a link, share it with teammates, embed it in another tool or wiki, or use available export options.
Next time someone asks:
“How do I publish an article again?”
You don’t write another explanation.
You send the Scribe.
Where This Becomes Really Useful
Think about all those little processes you’ve explained more than once: onboarding a new colleague, submitting an expense, updating a website, creating an invoice, uploading files, using internal software or completing some oddly specific task that apparently only you know how to do.
If you can demonstrate it on your computer, there’s a good chance you can document it while you’re doing it.
And unlike a screen-recording video, the person following the instructions doesn’t necessarily have to keep pausing, rewinding and trying to find the exact moment when you clicked something.
They simply follow the steps.
The 99% More Efficient Part
The clever thing about Scribe isn’t really AI.
It’s that creating the documentation happens while you’re already doing the work.
Instead of:
Do the task → Do it again for screenshots → Write the tutorial → Format everything
you get:
Do the task → Tutorial exists.
The next time someone asks you to “quickly explain how you do that,” don’t explain it.
Do it once. Let Scribe explain it forever.